Creating a professional-quality home studio doesn’t have to be expensive. I’m a seasoned sound engineer excited to share my best DIY tips. These tips will help you build a recording workspace at home without spending a lot. Whether you’re just starting or you’re a pro, these strategies will give you a home studio that sounds professional without costing too much.
This article will cover everything you need to know. I’ll guide you through setting up a home recording studio on a budget. You’ll learn about the right computer and digital audio workstation (DAW) to use. Plus, I’ll show you how to make your recording space sound better. This will help you get studio-quality audio from your own home.
If you’re ready to improve your sound engineering skills without spending a lot, keep reading! With these DIY home studio setup tips, you’ll be making high-quality recordings like a pro in no time.
Crafting a Budget for Your Home Studio
Before you start buying gear for your home studio, make a realistic budget. First, figure out how much you can spend. This helps you find the best value for your home studio budget.
Start With a Budget
Being honest about your money is key when budgeting for home recording. Think about your income, savings, and other bills. This way, you set a budget that won’t be too hard to follow. You can always add more gear later as you earn more.
Cost-Effective Tips
Here are some ways to save money on affordable home recording gear:
- Choose mid-range or used gear instead of the most expensive. You can get great quality for less money.
- Look for bundle deals and sales. Many stores give discounts when you buy several items at once.
- Buy equipment that can do many things in your studio.
- Focus on the basics like a computer, audio interface, and microphone first. Then add more as you can.
Plan your home studio budget well and look for deals to make a pro-quality studio without spending too much. With creativity and smart shopping, you can get great results on a budget.
Essentials: Computer, DAW, and Audio Interface

At the heart of a home recording setup are three key parts: the computer, DAW software, and audio interface. These work together to turn your ideas into professional-sounding music.
Computer Specs for Music Production
Your computer must handle music production well. It should have a fast processor, lots of RAM, and a big SSD. Look for at least 8GB of RAM, but 16GB or more is better for many tracks and instruments.
Choosing the Right DAW
The DAW is the software that runs your home recording. You can choose from Pro Tools, Logic Pro, or Ableton Live, each with its own strengths. Think about your budget, project complexity, and workflow when picking the best DAW for home recording. Many DAWs let you try them out for free before buying.
The audio interface connects your instruments and microphones to your computer. It changes analog signals into digital data for your DAW. Choose an interface with great preamps, enough input channels, and low latency for smooth recording.
By picking the right computer, DAW, and audio interface, you set up a strong base for your home studio. You’ll be able to record your music clearly and precisely.
sound engineering at home

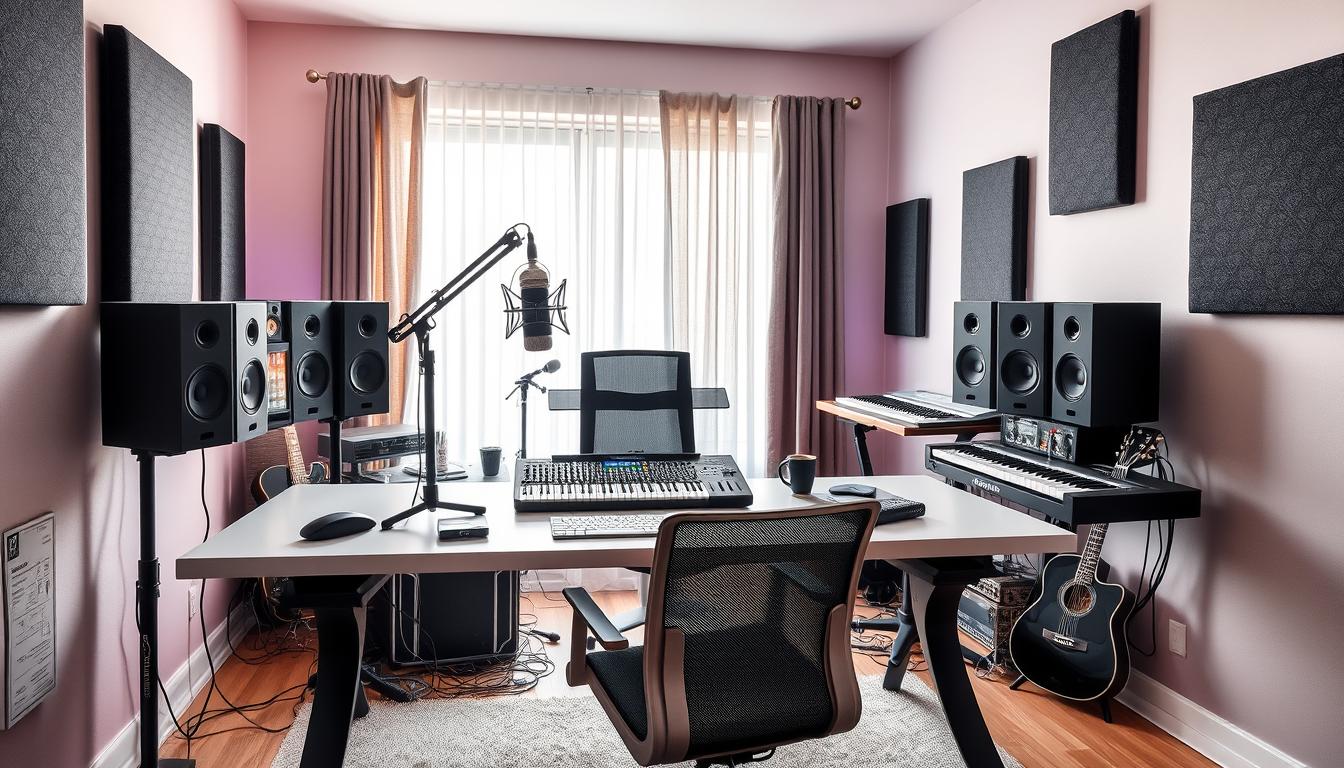
Making great audio at home is not just about having the right gear. It also means paying attention to your recording space’s acoustics. As a pro sound engineer, I’ll share tips on setting up speakers and acoustic treatment. This will help you get a balanced, studio-quality sound in your home studio.
Setting Up Monitor Speakers
Choosing the right monitor speakers is key for clear monitoring and mixing. Think about your room’s size and your budget when picking speakers. Small rooms do well with compact, nearfield monitors. Big rooms need larger, full-range speakers.
It’s important to set up your speakers right. Put them at ear level, facing you, and make sure they’re the same distance from each other and the walls.
Acoustic Treatment Basics
Acoustic treatment is vital for fixing issues like reflections and unwanted resonances. Start with DIY solutions like acoustic foam or panels on walls and ceilings. Try different spots and amounts to see what works best for your space.
Sound engineering at home is a learning process. By tweaking your speaker setup and adding acoustic treatment, you’ll get closer to making pro-sounding mixes from home.
Recording Gear: Microphones and Headphones
Building your home studio needs the right microphones and headphones for top-notch audio. These tools are key for recording vocals, instruments, or drums. The best microphones can change everything.
Choosing the right microphones for a home studio is important. For vocals, try a large-diaphragm condenser like the Rode NT1-A or the Shure SM7B. They give a rich, detailed sound. For instruments, a dynamic mic, such as the Shure SM57 or the Sennheiser e906, works great. And for drums, mix condenser and dynamic mics, like the Rode M5 and the Audix D6, for the best sound.
Also, picking the right headphones for music production is key. Open-back headphones, like the Sennheiser HD 6XX series, give a wide, natural sound. They’re perfect for monitoring and mixing. Closed-back headphones, such as the Audio-Technica ATH-M50x, are great for overdubbing and tracking. They block out noise well.
When choosing audio equipment for home recording, focus on what you need and what you can afford. The right microphones and headphones will help you make professional-quality recordings at home.
Optimizing Your Recording Space
Getting pro-sounding recordings at home means making the right space. The room where you set up your studio affects your audio quality a lot. By picking the best room and using room treatment, you can fix issues like echoes and bad sound waves. This makes your home tracks sound better.
Selecting the Right Room
When picking a room for your studio, think about size, shape, and ceiling height. You want a room that’s long and tall, at least 8 feet high. Stay away from small or huge rooms. They can make your sound bad.
The best room is big enough for your gear but still sounds good. It should help you make great music without echo or bad sound waves.
Room Treatment Techniques
After finding the right room, work on the sound. Use DIY acoustic panels and sound-absorbing stuff to treat your studio. Put these panels on walls and the ceiling to reduce echoes. Also, add bass traps in corners for low sounds.
Connecting Your Home Studio: Cables and Accessories
Building your home sound engineering setup is almost done. Now, make sure everything connects well. You need the right cables and accessories for your gear. This lets you focus on making music, not fixing technical issues.
Key cables like XLR, ¼-inch, and MIDI are crucial. They help move audio signals from your gear to your computer. High-quality cables mean less signal loss and better sound quality.
But it’s not just about cables. Accessories like strong mic stands, pop filters, and monitor isolation pads make a big difference. They make your studio better to work in and improve your recordings by reducing noise and vibrations.